I always enjoy seeing the look on my customers' faces when I say, "Right, no priming, no sanding!" I remember back in May of 2011 when I first heard of CHALK PAINT® decorative paint by Annie Sloan and as a licensed California painting contractor, I'm ALWAYS searching for the best paint and the easiest to use. I always was a Benjamin Moore™ girl since 2001 and since I was first bitten by the CHALK PAINT® bug in June, I haven't looked back to my old friend Ben since. Now, I'm not bashing Ben, he makes a great premium wall paint, but I'm over him now. Just last week, I used Ben while doing a color consultation and working on matching our paint up for wood and trim and some Ben for the walls, I realized how very different our paints are from Ben.
Obviously, having your kitchen cabinets painted by a professional is costly. Why? Well, I call it 12 steps. The average kitchen cabinet job will run you usually anywhere from $4,000-$8,000. Having your cabinets done by a professional involves these steps:
1. Sanding
2. Cleaning with TSP
3. Primer Coat 1
4. Sanding
5. Primer Coat 2
6. Base Coat 1
7. Sanding
8. Base Coat 2
9. Light Sanding
10. Glazing (if you want an Antique Finish)
11. Polyurethane Coat 1
12. Polyurethane Coat 2
Now this doesn't even COVER the time between coats to dry. Still think you need a professional to do your cabinets? Think again. I'm often asked if I'm still doing contract work. I'm happy to say not as often as I used to, it takes a toll on my body, I have had one shoulder surgically repaired and another that needs it, also. Now that I've hit the big 4-0 this year, I'm thinking of long term. The beauty of what I do is that I get to teach my customers how to do their own cabinets!
If you don't know what TSP is, it is Trisodium Phosphate, a concentrated degreaser and cleaner. WEAR gloves and carefully mix! Here is the brand I use:
Annie Sloan's CHALK PAINT® for Cabinets:
1. Clean all surfaces with TSP (I NEVER skip this step because we always have grease on our kitchen cabinets!)
2. Paint in one of our 29 beautiful colors (or mix up your own custom color, I'm a fan of Louis Blue and French Linen right now!) It's going to dry fast. When it's dry, you can do the next step!
3. Paint on a second coat
4. Clear Wax
5. Dark Wax
6. Buff to a sheen
Lately I've been reading about other bloggers scoffing at the cost of CHALK PAINT®...but, why?
Consider this:
For one pot of CHALK PAINT® at the California selling price of $38.95, you can skip this:
Home Depot sells is right HERE for $39.98 a gallon. That's right, I said you DON'T need primer for just about any surface you are going to paint. No priming.
No more of this mess either (yuck):
Just paint it right on top of that surface. Stop buying sanding disks for your palm sander!
You have ugly cabinets? Check out what one of my customers in the North San Francisco Bay area did with his kitchen ON HIS OWN with 3 pots of CHALK PAINT® in Old White, 1 tin Soft Wax, 1 Wax Brush (total cost was under $200):
Before:
After:
If you want to learn to paint with CHALK PAINT® and aren't sure where to begin, send me an email and I'll tell you all about workshops held every month that will teach you all the basics on where and how to begin. In a workshop, we will cover three techniques and everything you need to conquer waxing with clear and dark finishes!
Wednesday, April 18, 2012
Sunday, April 8, 2012
Sunday, April 1, 2012
French Baskets created with CHALK PAINT® in French Linen
I have been on a roll lately and trying really hard to
keep up with the sales at my new "Patina" space.
I found a set of 3 boring baskets
at Goodwill not too long ago, they are even lined
with plastic if you wanted to put flowers in.
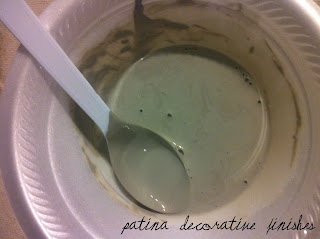
I mixed up a 1:1 ratio of Annie Sloan CHALK PAINT®
French Linen (my favorite color) and water to thin
it down so I could paint a wash onto the baskets.
This is a great trick to "grey" vintage picnic baskets, too!
Thanks to Debbie at 'Round the Coop and her awesome
Pinterest, I found this tutorial about how to print on burlap.
When I was in Oxford, England visiting Annie Sloan
at her shop, I scored a grain sack from France. I framed
the front and had some amazing remnants from the
back of the sack. So, using this tutorial...
'Round the Coop DIY board on Pinterest,
I used my basic Canon inkjet to produce this
I used my basic Canon inkjet to produce this
image on my French burlap with an image
from The Graphics Fairy
from The Graphics Fairy
Affixed it to the front of my new French basket
and added my latest obsession, Cotton Bolls (not a typo!)


